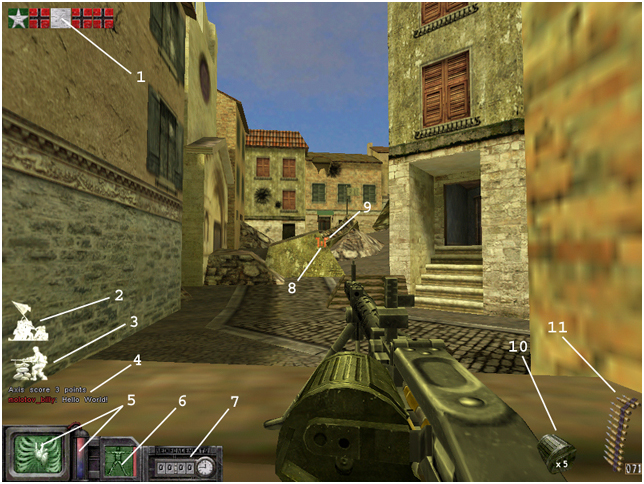
1. Objective Status - Let's you know who is in possession of what flags, including 'neutral' flags. Area capture flags will slowly change colors as they are being captured.
2. Area Capture Indicator - Let's you know that you are in an "Area Capture Zone." Standing in a capture zone will slowly change the flag of that zone to your side. Some area captures require more than one person to capture.
3. Machine Gun Nest Indicator - Let's you know that you are in an area that allows you to deploy your bipod while standing. This will work only for the Machine Gunner classes. These nests area usually found near bunkers, sandbag walls, and window sills.
4. Message Area: This area is reserved for map messages and chat messages.
5. Stamina Indicators - A graphic display of how much stamina your player currently has. Stop moving to regain stamina. Crouching and proning will allow you to regain stamina faster.
6. Health Indicator - A graphic display of a player's current health. Health cannot be recharged like stamina can.
7. Reinforcement Timer - This let's you know when the next 'reinforcement wave' will be spawning.
8. Crosshair, center - The center part of your crosshair is an indicator of how accurate your fire will be. This part will roam around the screen as you move, indicating innaccuracy.
9. Crosshair - This part of the crosshair does not move, and is a general indication of where you are generally aiming/pointing to.
10. Clips - A graphic representation of the number of
clips left in your inventory, not including the clip
that is currently loaded.
11. Ammunition - Number of rounds left in your current clip.